本文档介绍了在不使用Dell Open Manage Server Assistant (DOSA) 光盘引导的情况下,如何安装Windows 2003 Server 到您的Dell PowerEdge 830/850上。这个过程需要大约45 到 60 分钟。(本文所有图片取自于PE850机器安装过程) *通常不使用Dell Open Manage Server Assistant 光盘引导安装主要是基于以下一些原因:
1. 原有的硬盘分区里有重要的数据, 需要保留. 而使用DOSA光盘安装, 将会删去硬盘上的原有分区;
2. 原有硬盘上有动态磁盘分区,DOSA光盘引导将导致系统自动重启, 而进入不了安装界面。 索引
步骤1. 识别您的Power Edge 服务器的系统配置
步骤2. 安装前的准备
步骤3. win2003安装步骤
步骤4. 驱动程序的安装 步骤1. 识别您的Power Edge 服务器的系统配置 Note:具体信息随配置不同,请根据自己的配置正确安装。
常见830/850服务器集成的设备:
·集成一块(PE830)/两块(PE850)网络适配器Broadcom BCM5721J以太网卡;
·XGI XG20显示卡;
·830/850可使用的硬盘控制卡:
- embedded ICH7R SATA控制器 - CERC SATA 1.5G/6CH控制器 - Adaptec 39320 SCSI控制器 - PERC 4/SC控制器 - PERC 4e/DC控制器
步骤2. 安装前的准备
2.1 安装操作系统前请您先准备好以下物品
· 硬盘控制卡驱动软盘
- embedded ICH7R SATA控制器驱动下载地址 http://ftp.us.dell.com/scsi-non-raid/R99849.exe - CERC SATA 1.5G/6CH控制器驱动下载地址 http://ftp.us.dell.com/SATA/CERC7427_A01.exe - Adaptec 39320A SCSI控制器驱动下载地址 http://ftp.us.dell.com/scsi-non-raid/R99849.exe - PERC 4/SC控制器 http://ftp.us.dell.com/scsi-raid/perc-cerc-w2k-5.48-A04.exe - PERC 4e/DC控制器 http://ftp.us.dell.com/scsi-raid/perc-cerc-w2k-5.48-A04.exe · Windows 2003安装光盘 2.2设置BIOS
1.开机自检时按F2键进入系统BIOS
2.光标移到BOOT SEQUENCE ,敲回车进入引导设备列表
3.光标移到CD_ROM DEVICE,按";-";键直到CD_ROM跳到第一项,并保证此项最左边有"v"标志(该标志用空格键选取)
 4.用同样方法把Hard drive C:列为第二引导设备,并也有"v"标志
5.按ESC键退出引导设备选择界面
6.按ESC键,敲Enter键保存退出 步骤3. Win2003安装 Text Mode Setup 文本模式安装
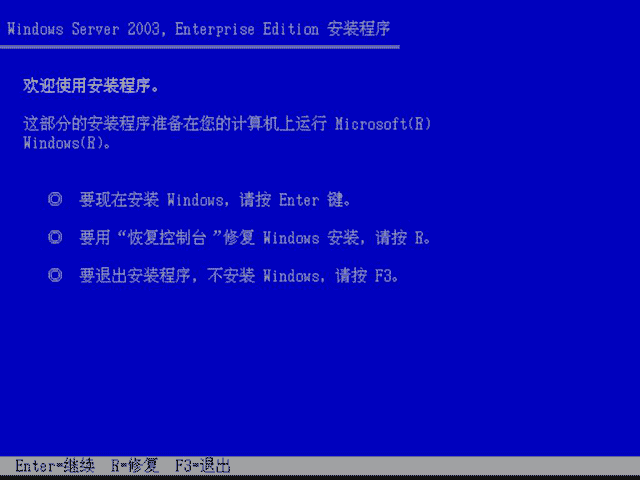
1. 把 Windows 2003 安装光盘放入光驱,并从光盘引导。
2. 在屏幕的底部出现信息:Press F6 if you need to install a third party SCSI or RAID driver 时,按"F6"键。
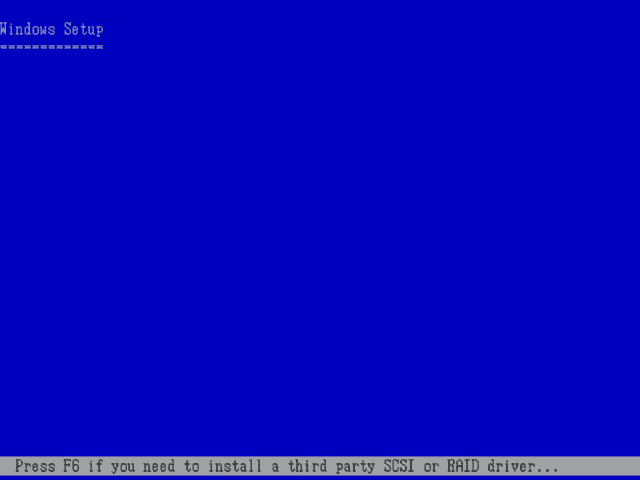
这个动作将会停止硬件的自动检测,并且允许您指定第三方硬件的驱动程序(如:PERC)。
3. 按完"F6",后,安装程序会继续加载模块。这是正常的。过一会儿后,您将会看到以下信息:Setup could not determine the type of one or more mass storage devices installed in your system, or you have chosen to manually specify an adaptor.
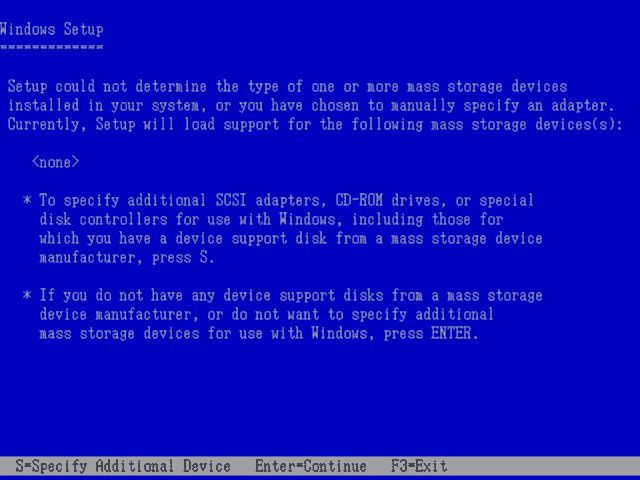
4. 按"S" 键加载指定设备驱动程序。
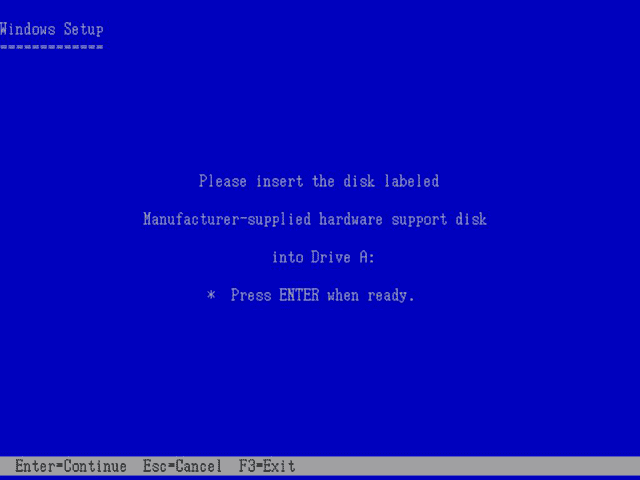
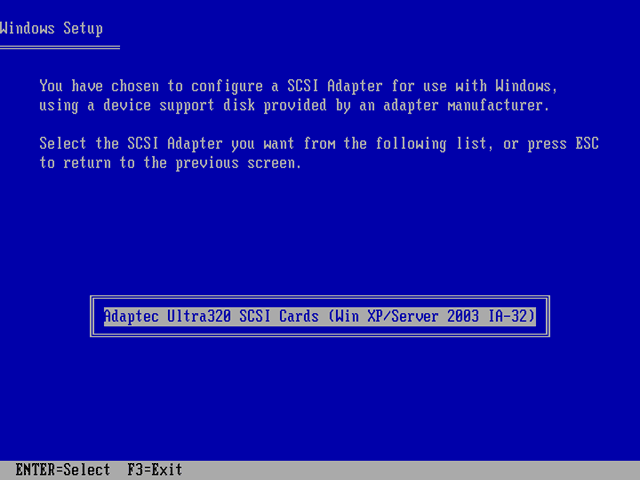
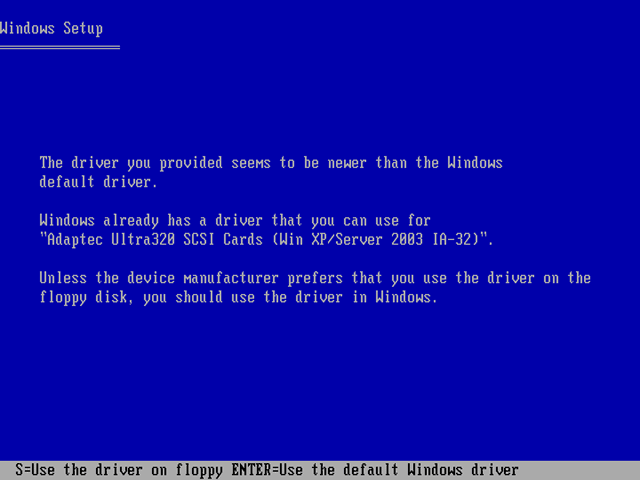
5. 插入硬盘控制卡驱动软盘并按"Enter",在设备列表里会有一项服务器所配置的硬盘控制卡的选项,按"Enter"加亮选择。如:在设备列表里会有一项选项Adaptec Ultra320 SCSI Cards(Win XP/Server 2003 IA-32)按"Enter"加亮选择。
Note:此项选择由具体阵列卡或SCSI控制器型号决定
6. 按S选择从软盘安装驱动,拷贝完成后,安装程序将返回到设备列表界面。确定服务器RAID卡驱动在列表里,并按"Enter"继续。
[
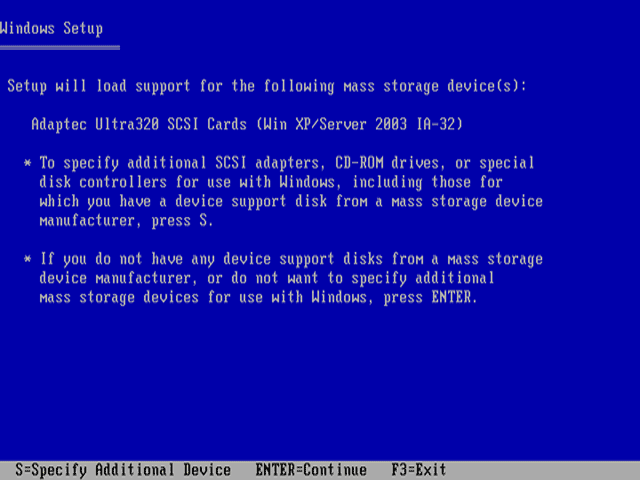
7. 安装程序搜索系统里其它大容量的设备,如:SCSI和IDE控制器。这个步骤需要几分钟。
8. 按"Enter",安装Windows 2003。
9.您将看到如许可协议画面。
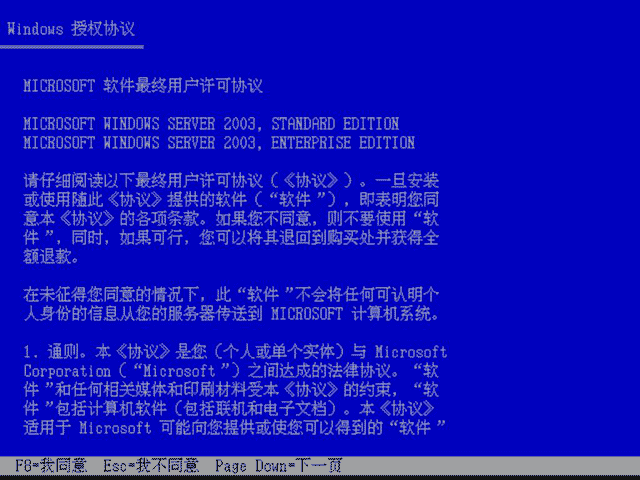
10. 阅读许可协议,并按"F8"键接受。
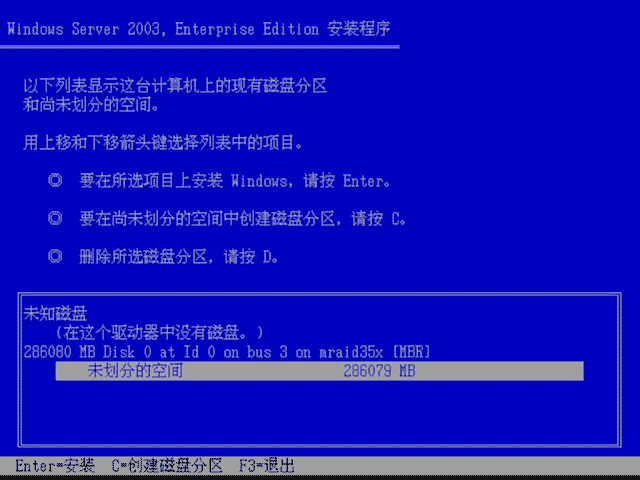
11. Disk 0 包含有未分区的空间,选择未分区空间,并按"C" 键创建分区。 NOTE:如果您是修复安装或重新安装,并且有重要数据在硬盘上,请不要删除原有硬盘分区。选择原系统盘进行安装。
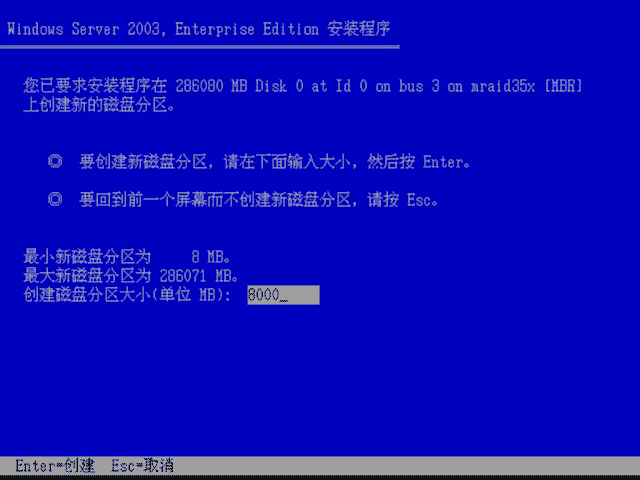
12. 输入分区的大小,并按 "Enter" 。
NOTE: 推荐分区的大小为 8000 或更大。
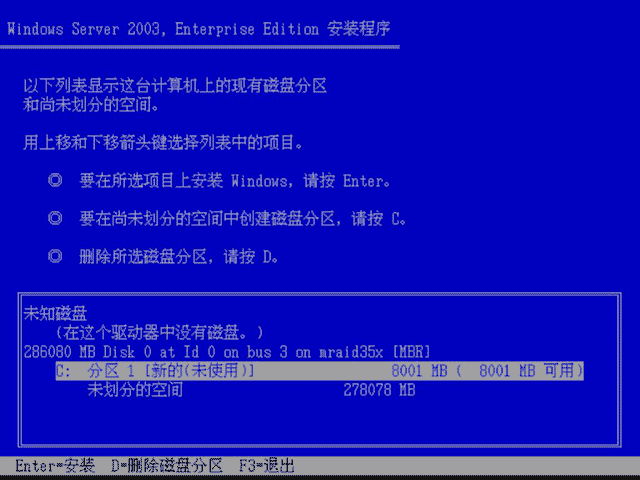
 13. 选择 C: New(Unformated) 分区,并按 "Enter" .
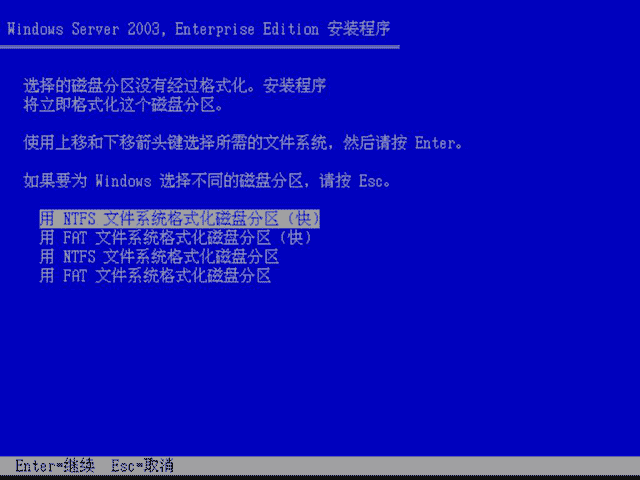
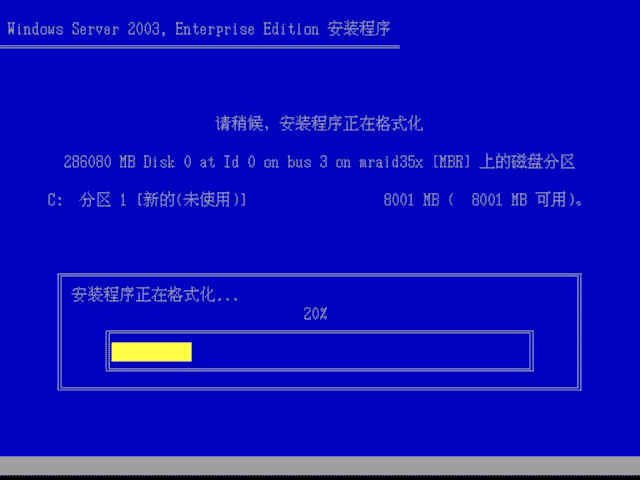
 14. 为分区选择文件格式,并按"Enter" . 开始格式化分区。
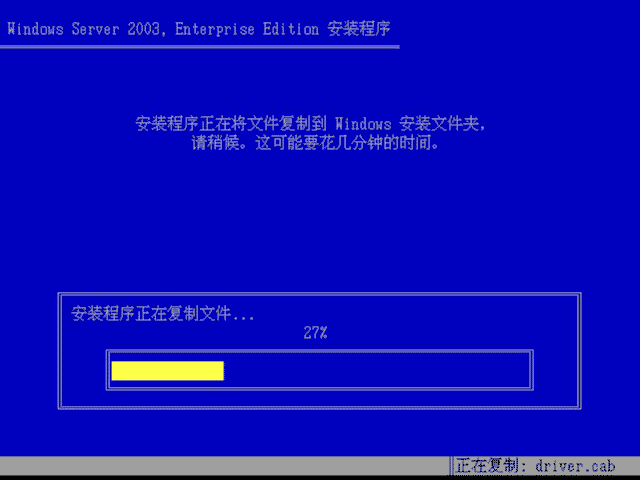
 15. 格式化完成后,安装程序开始拷贝文件到系统。
 16. 如果您已经取出了PERC 驱动程序盘,将提示您重新插入该盘。系统将拷贝驱动到分区。
17. 当安装程序完成了文件的拷贝,系统将自动重新启动 (注:请把软盘取出!!),并且自动启动图形安装部分。
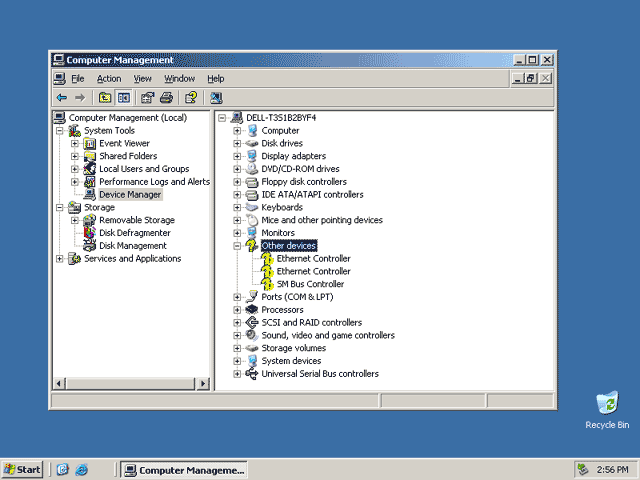
3.2 图形安装界面 WINDOWS 2003系统图形安装过程介绍省略。如要了解详细过程,请查看《WINDOWS 2003系统图形安装文档》。 步骤4.驱动程序的安装 - Windows2003安装完成,运行设备管理器“device manager”你会发现3个设备还未加载驱动,通过搜索驱动光盘可以加载所有驱动
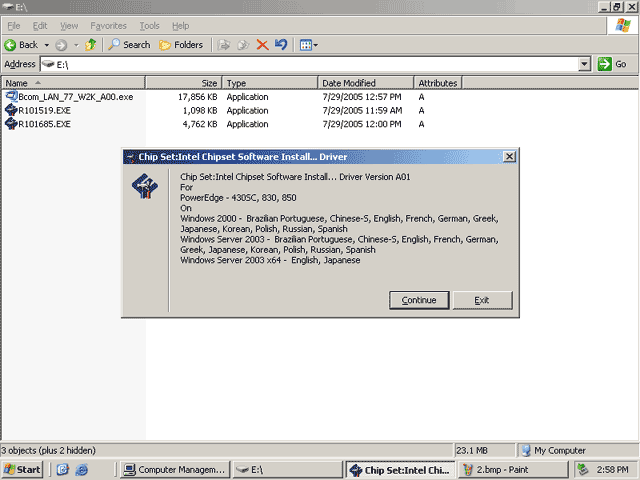
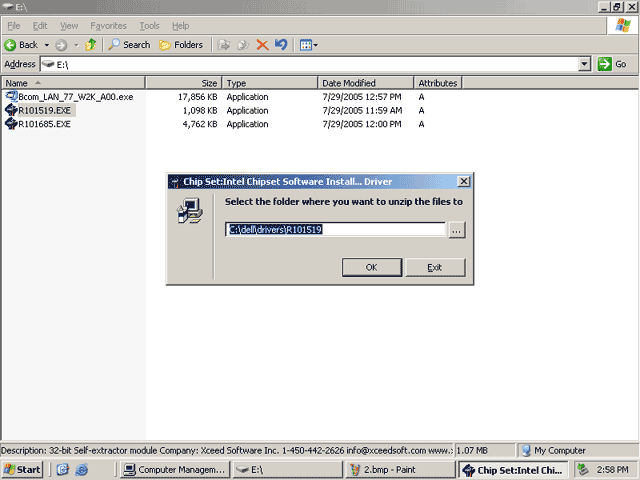
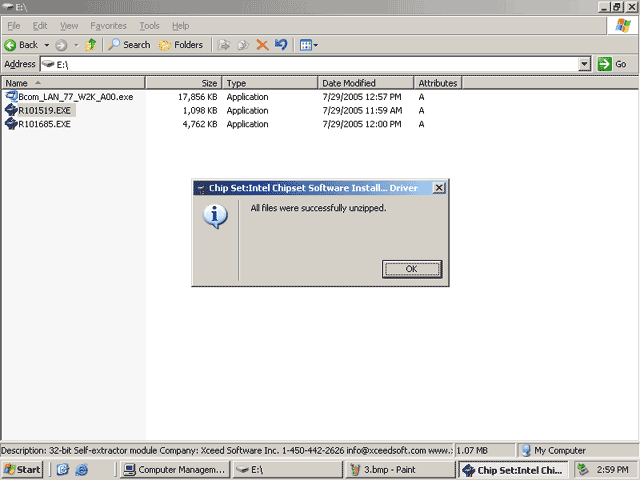
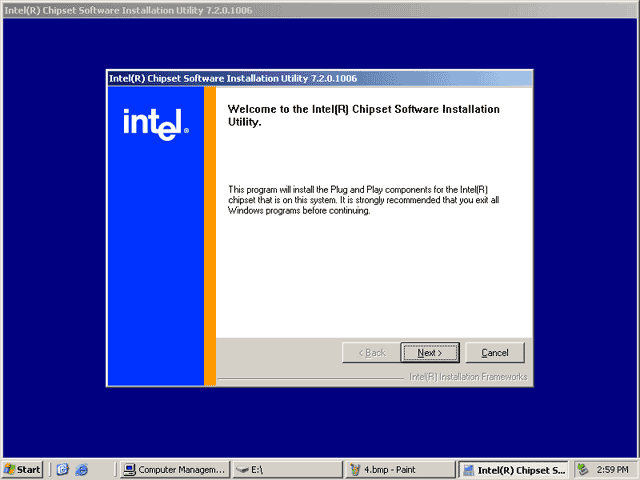
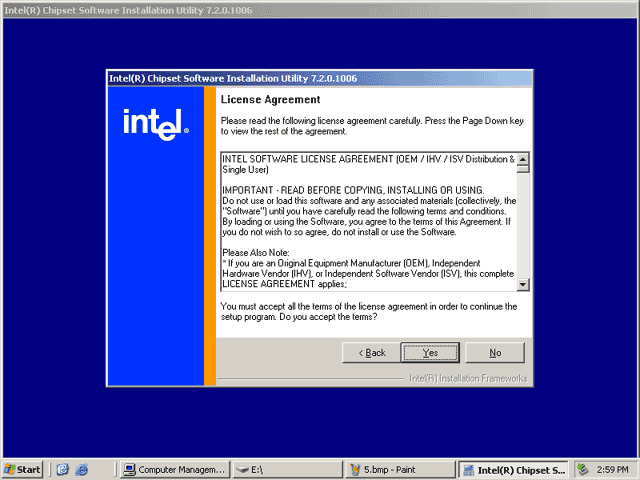
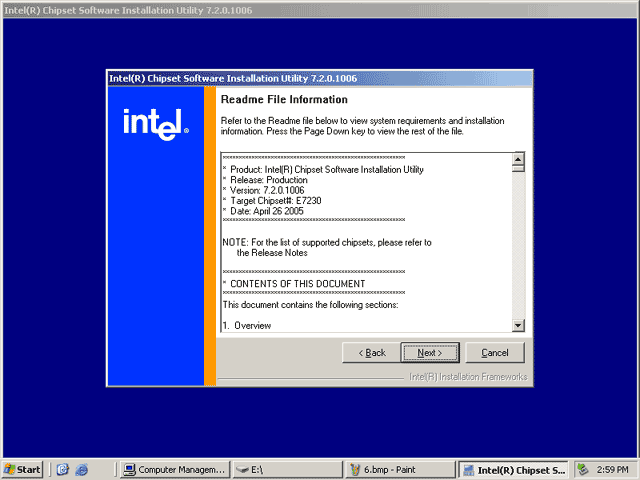
假如没有DELL的引导盘(Dell OpenManage Server Assistant),可从以下地址下载驱动 芯片组驱动:http://ftp.us.dell.com/chipset/R101519.EXE 网卡驱动:http://ftp.us.dell.com/network/Bcom_LAN_77_W2K3_A00.exe 芯片组驱动安装: 直接解压到固定目录,系统将自动运行芯片组安装程序,如下图

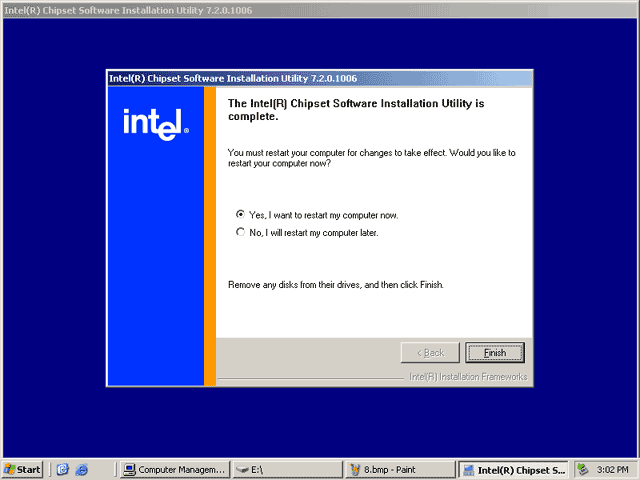
此处选择重新启动计算机
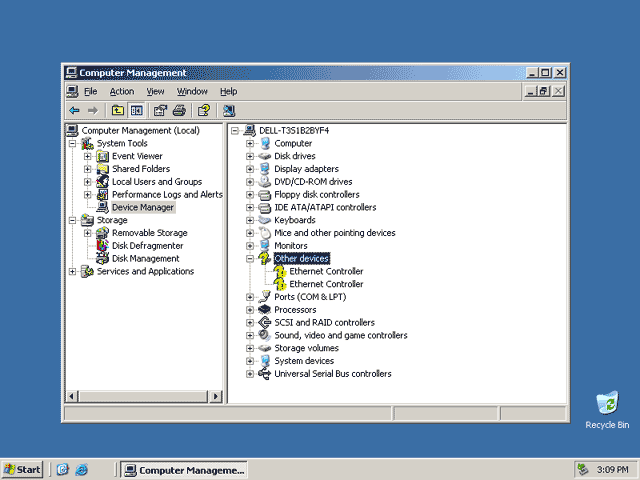
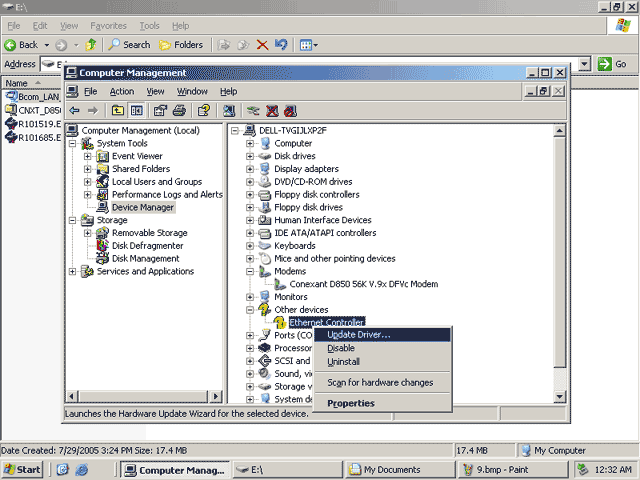
重新启动计算机后,设备管理器还有如下设备没有安装(两张网卡)
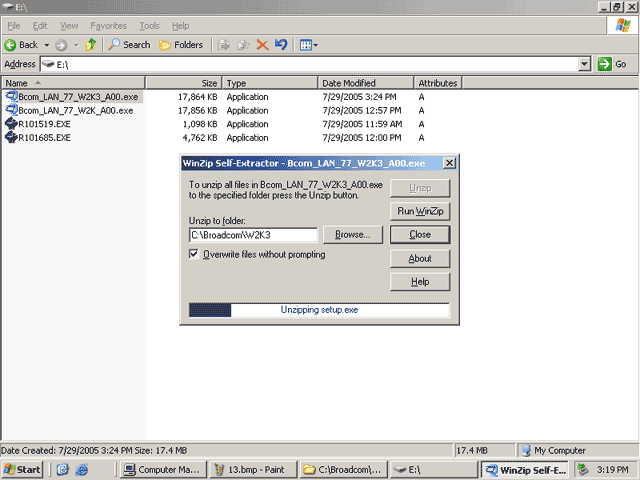
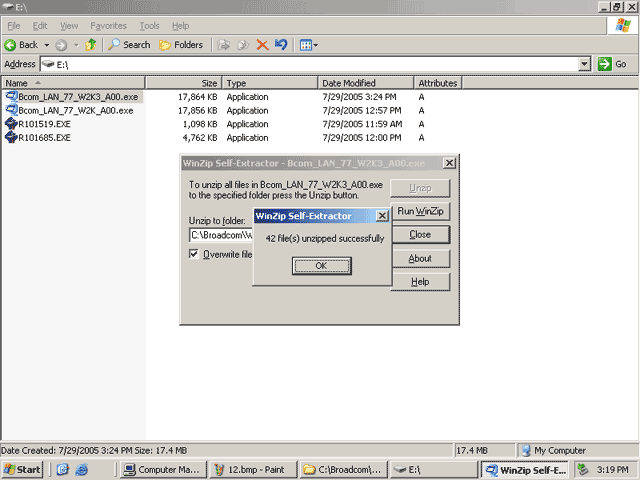
网卡驱动安装: 运行Bcom_LAN_77_W2K3_A00.exe将驱动解压到一临时目录
右击选择";Ethernet Contorller";选择";Update Driver";
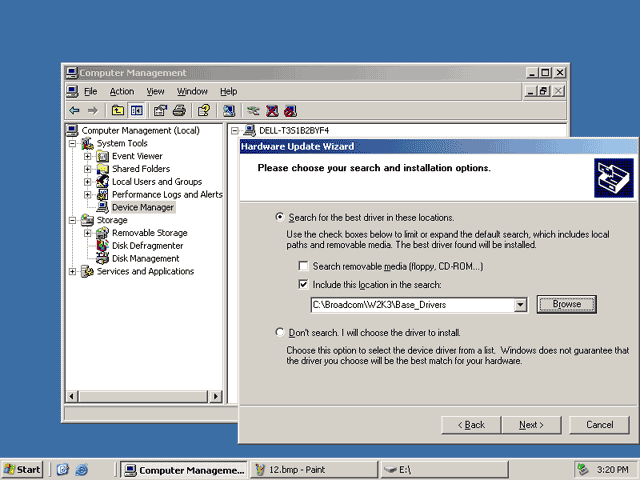
选择指定一个目录安装

将目录指向之前运行Bcom_LAN_77_W2K3_A00.exe产生的临时目录中的";Base_Drivers";,然后选择下一步
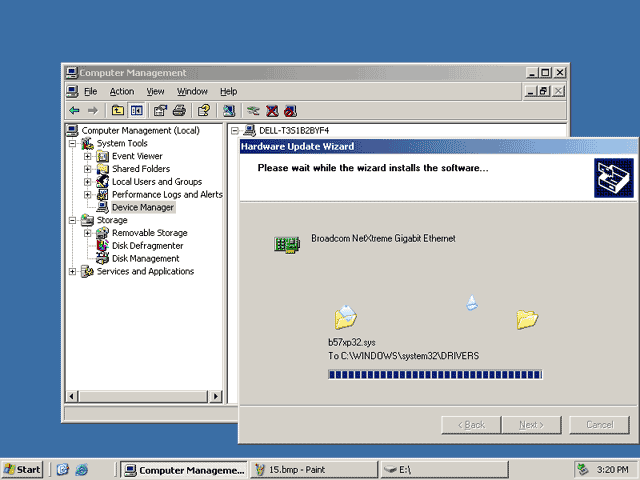
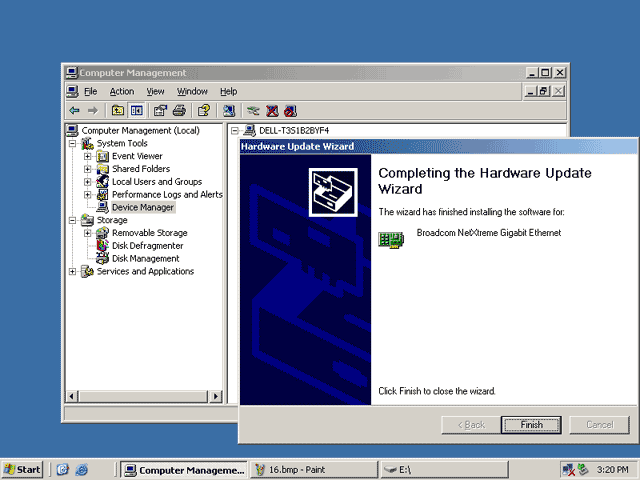
Bcom5721J网卡安装完成
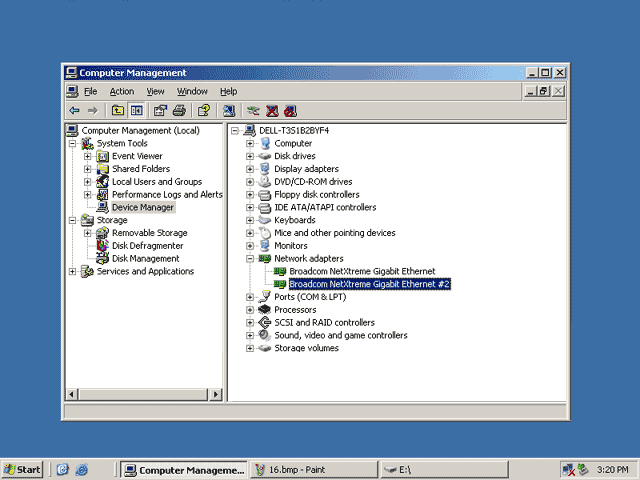
设备管理器中所有设备驱动加载完成
至此,Win2000在Dell PowerEdge 830/850上安装完成 | 


 鲁公网安备 37120302000001号


