
服务器相关设置如下: 操作系统:CentOS 6.6 64位 IP地址:192.168.21.129 网关:192.168.21.2 DNS:8.8.8.8 8.8.4.4 备注: CentOS 6.6系统镜像有32位和64位两个版本,并且还有专门针对服务器优化过的minimal版本 生产服务器如果是大内存(4G以上内存),建议安装CentOS-6.6-x86_64-minimal.iso版本 附:CentOS 6.6下载地址 32位minimal版本: http://mirror.bit.edu.cn/centos/6.6/isos/i386/CentOS-6.6-i386-minimal.iso 64位minimal.版本: http://mirror.bit.edu.cn/centos/6.6/isos/x86_64/CentOS-6.6-x86_64-minimal.iso 1、安装CentOS 6.6系统的计算机内存必须等于或者大于628M(最小内存628M),才能启用图形安装模式; 2、CentOS 6.6的系统安装方式分为:图形安装模式和文本安装模式; 3、CentOS 6.6文本安装模式不支持自定义分区,建议使用图形安装模式安装; 5、CentOS 6.6系统运行方式分为:带图形界面、可以用鼠标操作的图形化方式和不带图形界面、直接用命令行操作的文本方式(CentOS minimal版本默认是以文本方式运行,在系统安装的过程中没有系统运行方式的自定义选项); 一、安装CentOS 6.6 用光盘成功引导系统,会出现下面的界面 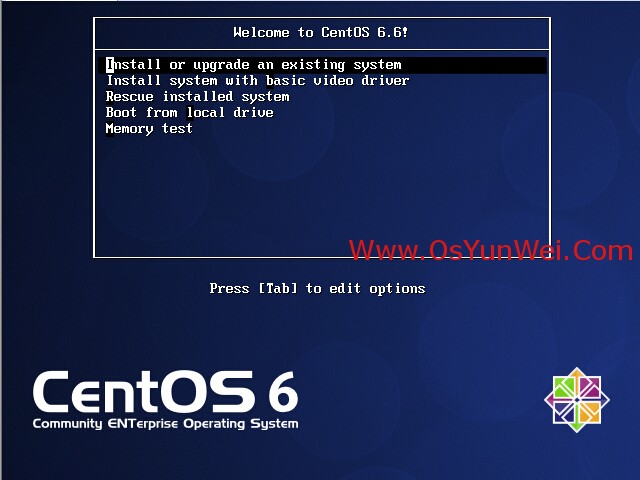
界面说明: Install or upgrade an existing system 安装或升级现有的系统 install system with basic video driver 安装过程中采用 基本的显卡驱动 Rescue installed system 进入系统修复模式 Boot from local drive 退出安装从硬盘启动 Memory test 内存检测 这里选择第一项,安装或升级现有的系统,回车。 出现是否对CD媒体进行测试的提问,这里选择“Skip”跳过测试。 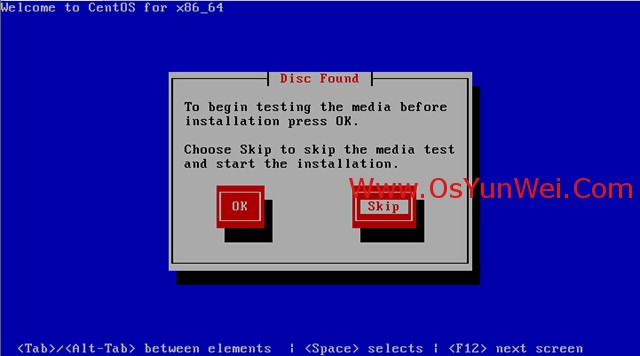
出现下面的界面 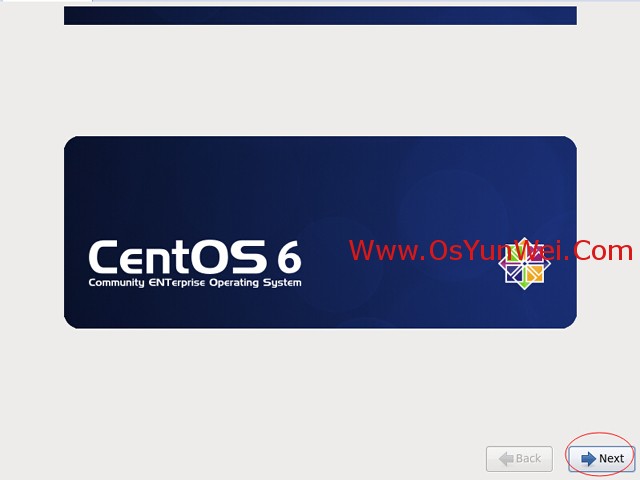
Next 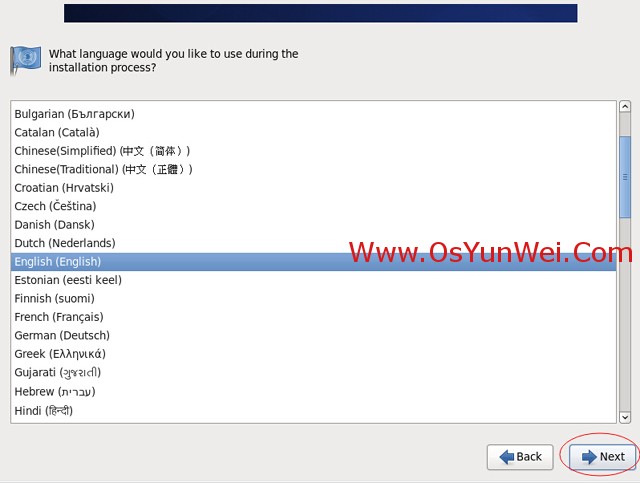
选择语言为:English(English) #生产服务器建议安装英文版本 Next 
键盘选择为:U.S.English Next 
选择第一项,基本存储设备 Next 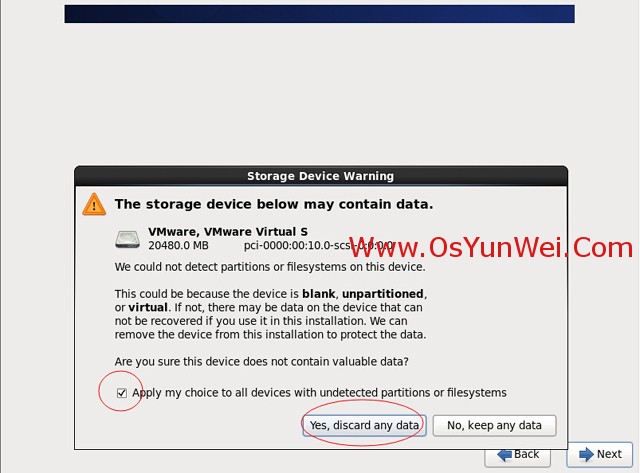
选择第一项:Yes,忽略所有数据 Next 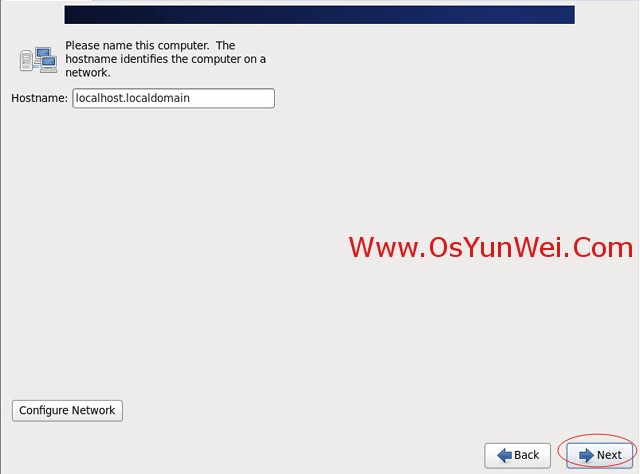
设置主机名,这里默认即可,安装完成之后再修改 Next 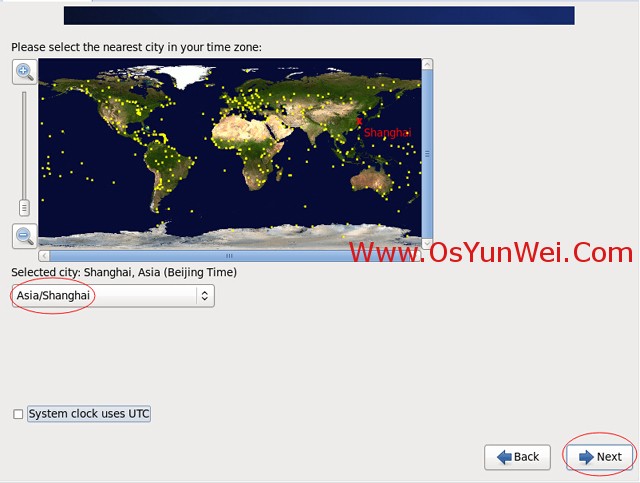
时区选择:Asia/Shanghai "System clock user UTC" #取消前面打勾,不使用UTC时间 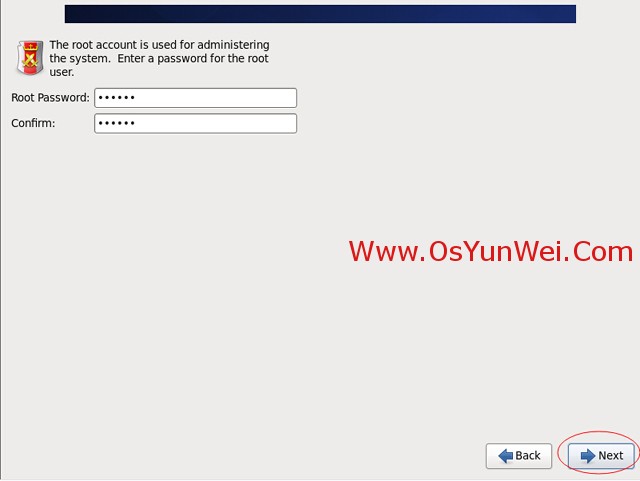
设置root密码 Next 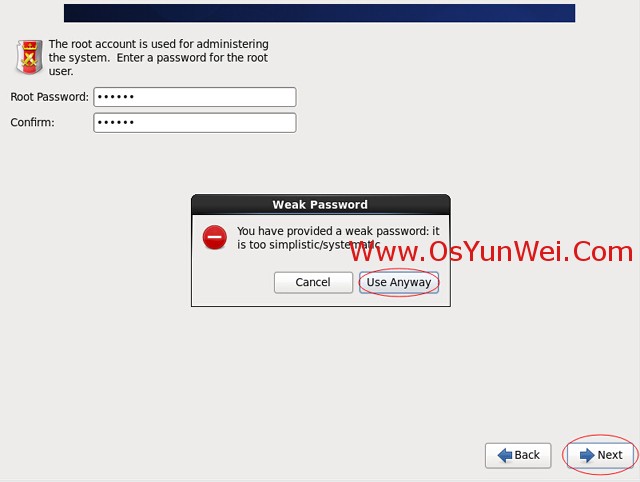
注意:如果你使用的密码过于简单,系统会自动提示:您的密码不够安全,过于简单化/系统化 这里选择“Use Anyway" 无论如何都使用 生产环境必须设置强壮复杂的密码 Next 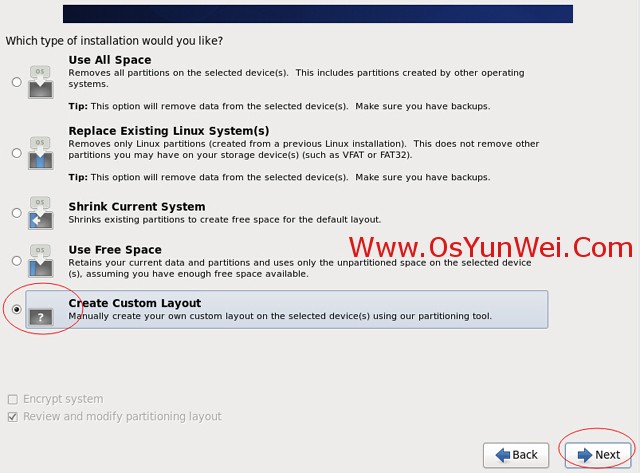
选择最后一项,Create Custom Layout 创建自定义分区 Next 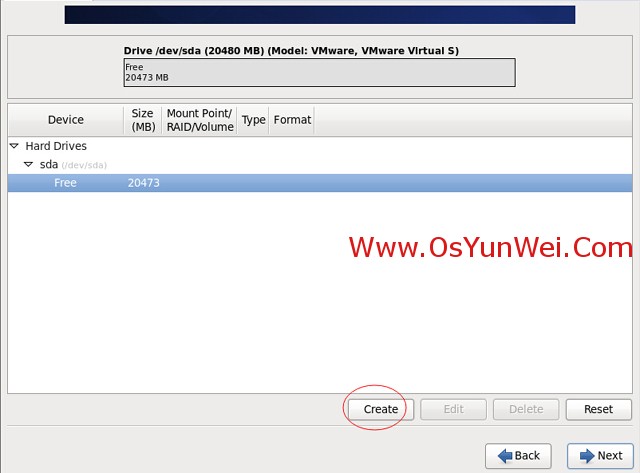
可以看到硬盘的容量,我这里显示的是20G,现在自定义分区。 注意:分区之前,自己先要规划好,怎么分区 我这里的分区如下: 硬盘总共20G swap #2048M,一般设置为内存2倍 / #剩余所有空间 特别说明: 用于正式生产的服务器,切记必须把数据盘单独分区,防止系统出问题时,保证数据的完整性。比如可以再划分一个 /data专门用来存放数据。 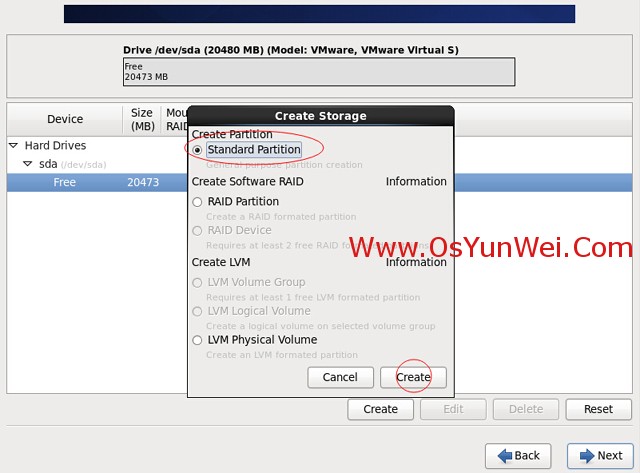
选中空闲分区Free,点创建Create 选择标准分区Standard Partition,点创建Create 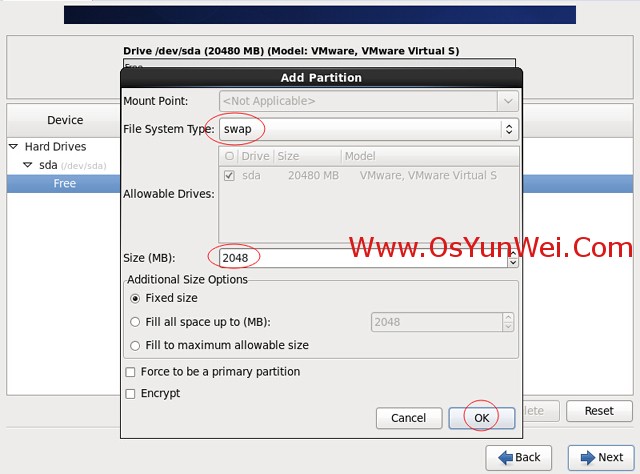
文件系统类型:swap 大小Size:2048 其他选项默认即可 确定 OK 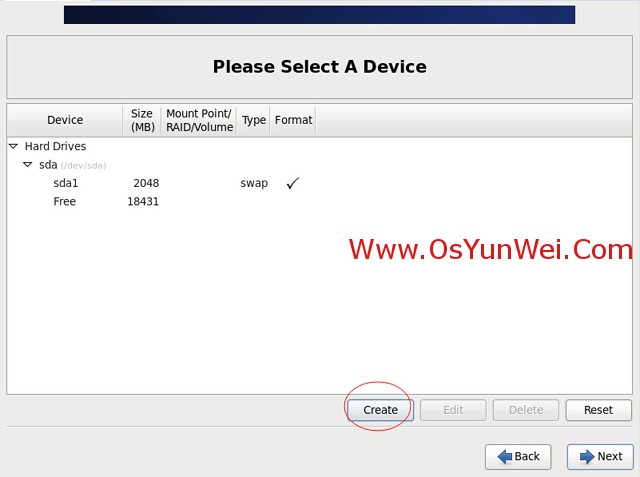
继续选中空闲分区Free,点创建Create 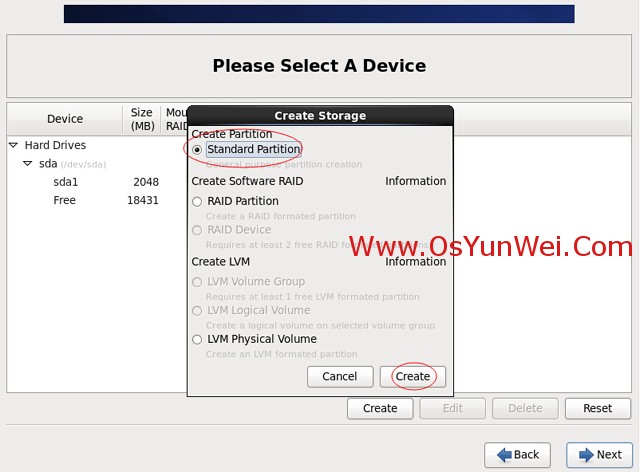
选择标准分区Standard Partition,点创建Create 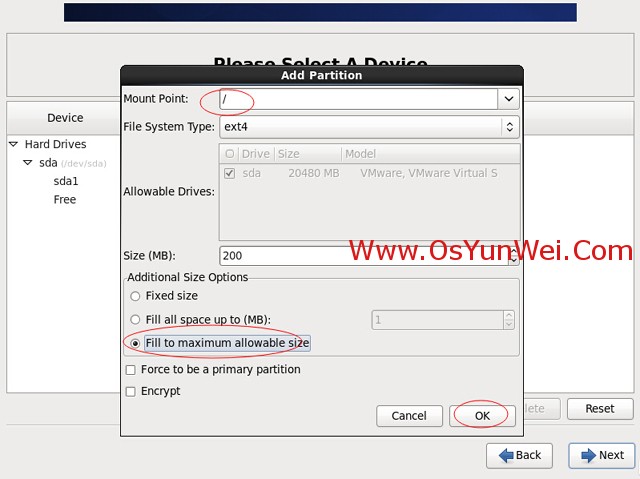
挂载点:/ 文件系统类型:ext4 选中“使用全部可用空间” 其他选项默认即可 确定 OK 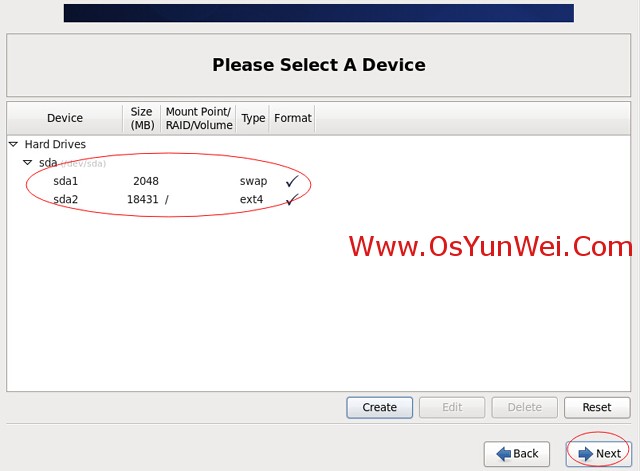
创建好分区之后,如上图所示,然后点Next 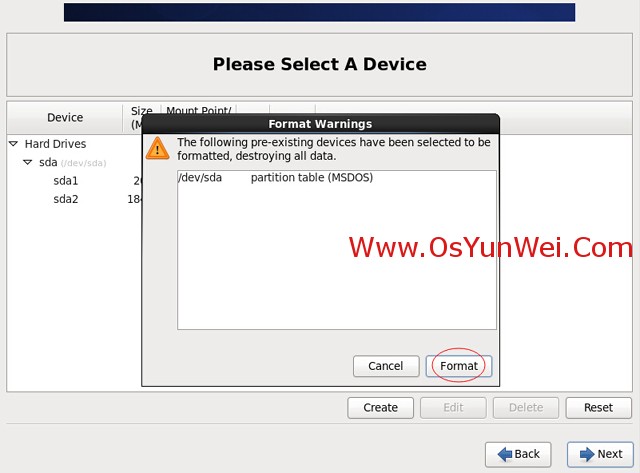
点“Format”格式化 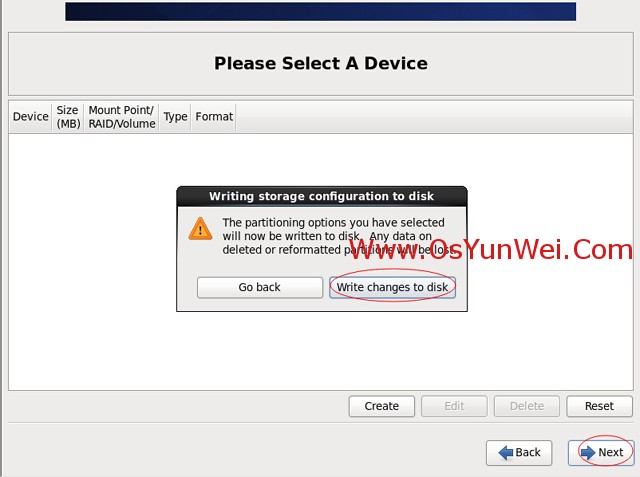
选择“Write changes to disk”将修改写入磁盘 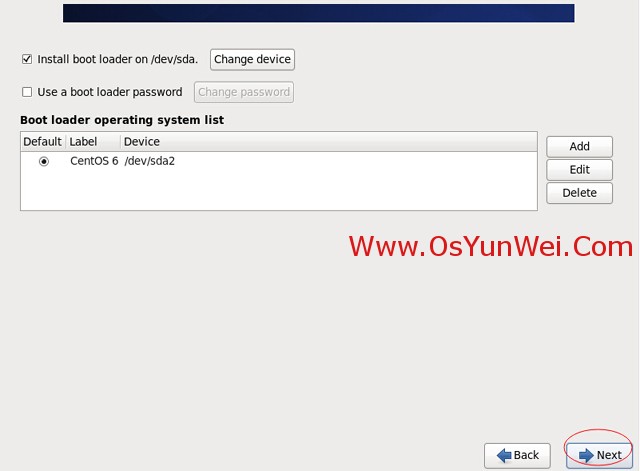
默认 Next 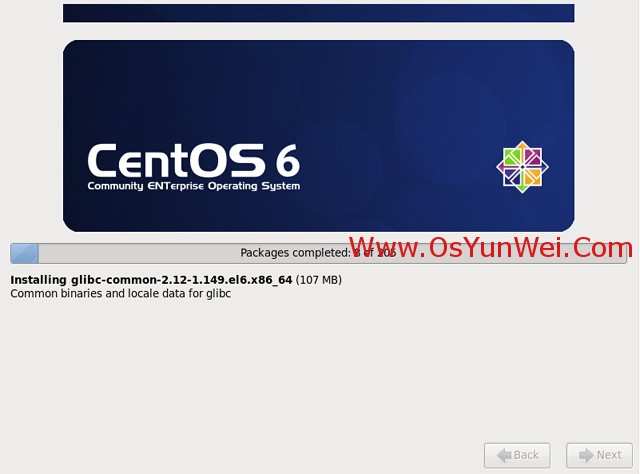
开始安装 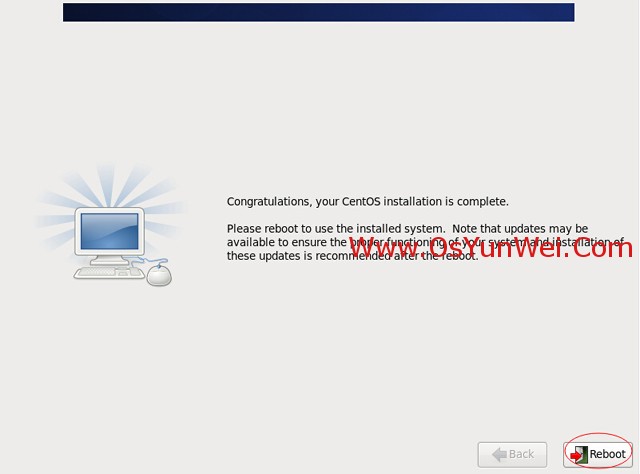
安装完成 点“Reboot”重新引导,系统自动重启 
重启之后,出现下面登录界面 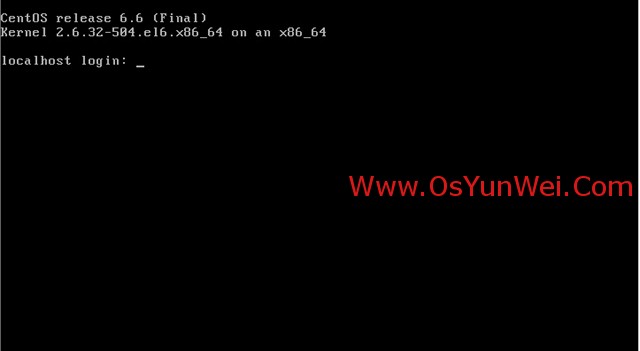
输入账号root和密码,成功登录系统,如下图所示: 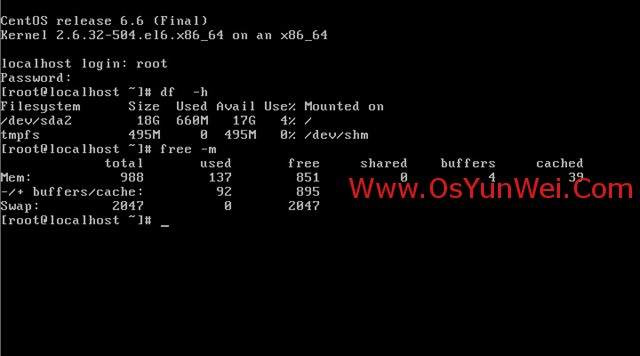
系统安装完成 二、设置IP地址、网关、DNS 约定: 第一块网卡为外网 第二块网卡为内网(没有外网的机器也要将内网配置在第二块网卡上) 说明:CentOS 6.6默认安装好之后是没有自动开启网络连接的! 输入账号root 再输入安装过程中设置的密码,登录到系统 vi /etc/sysconfig/network-scripts/ifcfg-eth0 #编辑配置文件,添加修改以下内容 BOOTPROTO=static #启用静态IP地址 ONBOOT=yes #开启自动启用网络连接 IPADDR=192.168.21.129 #设置IP地址 NETMASK=255.255.255.0 #设置子网掩码 GATEWAY=192.168.21.2 #设置网关 DNS1=8.8.8.8 #设置主DNS DNS2=8.8.4.4 #设置备DNS IPV6INIT=no #禁止IPV6 :wq! #保存退出(按esc再输入:wq!) service ip6tables stop #停止IPV6服务 chkconfig ip6tables off #禁止IPV6开机启动 service yum-updatesd stop #关闭系统自动更新(yum-updatesd: unrecognizd service) chkconfig yum-updatesd off #禁止开启启动(yum-updatesd: unrecognizd service) service network restart #重启网络连接 ifconfig #查看IP地址 三、设置主机名 约定: 主机名命名规范:业务.机房.主备.域名 这里设置主机名为:bbs.hz.m.osyunwei.com 1、hostname “bbs.hz.m.osyunwei.com” #设置主机名为bbs.hz.m.osyunwei.com 2、vi /etc/sysconfig/network #编辑配置文件 HOSTNAME= bbs.hz.m.osyunwei.com #修改localhost.localdomain为bbs.hz.m.osyunwei.com :wq! #保存退出 3、vi /etc/hosts #编辑配置文件 127.0.0.1 bbs.hz.m.osyunwei.com localhost #修改localhost.localdomain为bbs.hz.m.osyunwei.com :wq! #保存退出 shutdown -r now #重启系统 至此,CentOS 6.6系统安装配置完成 | 


 鲁公网安备 37120302000001号


